
I have added masking and a section on the iPhone-specific user interface.
https://www.gentlemencoders.com/nitro/user-manual/index.html
Blog
Manual Updated
I updated the manual today with information on Presets, LUTs, R+J Editing, and Quick Fixes. I also added some navigation controls to make it easier to jump around.
You can get the manual here: https://www.gentlemencoders.com/nitro/user-manual/index.html
Moving to Blue Sky
I stopped posting on Twitter some time ago. I will start posting on Blue Sky. Here is the handle: @gentlemencoders.bsky.social
The Blog is Back…
I’m starting up the blog again to give people a little more insight into what’s going on with the apps. Since I do not want to inundate you with emails, I will update the blog (occasionally) instead. If you have an RSS reader, you can get automatically notified when new posts go up. The feed is https://support.gentlemencoders.com/feed/
I am getting close to releasing the next version of Nitro, which will be 2025.1. It has a mix of new features, usability, performance, and bug fixes [which is the norm for my updates]. I have been releasing new versions more frequently recently, after a lull in the fall (which was due to pressing personal matters). My goal is to send out new versions every 2 months on average. Monthly updates are too frequent to add features of consequence – there is a lot of overhead in shipping new versions, so there is a tension between getting “real” work done and getting software to you. Hopefully that cadence + this blog will satisfy people’s desire for software and news.
As far as RAW Power goes, there will be an update to RAW Power with the 2025.2 version of Nitro that has some camera support and bug fixes.
The Future Is Here: Introducing Nitro

You may not know this, but RAW Power is built by just one person (me). For the past two years, I’ve been working like crazy on a new app. And now, I am proud to introduce Nitro to you. Nitro is written from the ground up with the latest technologies, and its combination of flexible storage options, camera support, and editing tools is unmatched by any app.
If you like RAW Power, you’ll love Nitro’s fresh interface and immense power. I have been fielding emails from many of you for some time, asking for features like gradients, brushing, cloning, XMP sidecars, synchronized zoom, and more. All of those (and a lot more) are in Nitro.

Nitro comes with a REAL free trial. No strings attached – you don’t have to sign up for a subscription. After you try it, you can buy it outright, or sign up for an inexpensive monthly or annual plan. Check out the Questions and Answers below to learn more.
RAW Power edits are 100% compatible with Nitro. If you use the Photo Library, Nitro reads RP edits automatically. If you use the Finder, then get the RAW Power update to use the new “Export Nitro XMP Sidecar” feature.
Enough talk. Here is a 30 second video about Nitro for Mac.
| English | Deutsch | Français |
You can also see screenshots and more information on the App Store and on my website.
| Mac App Store | Nitro Website |
Today, Nitro is available for macOS. What about iOS? Well, Nitro for iOS is coming soon! Your purchase of Nitro for Mac will also give you full access to the iOS version when it’s released. I’m looking for a small number of dedicated beta testers for Nitro for iOS. if you use RAW Power for iOS regularly and are interested, please email Nitro iOS Beta Sign Up. Note: I cannot accept everyone who applies for beta testing, because large beta groups are too hard to manage.
Questions and Answers:
Why did you write a new app / Why not just add these features to RAW Power? I initially wrote RAW Power in 2016 as a simple photo extension. iOS and Mac apps were separate worlds and the dominant Apple technologies of today (for example, Metal) either did not exist, or were immature. Fast forward several years, and now all of those things have changed. Apple has even moved to a new programming language! Further, the underpinnings of RAW Power have become an obstacle to advancing the app. For example, the RAW Power engine is simply not able to handle features like masking and synchronized pan and zoom. I decided some time ago to start fresh, even though that would take a long time, because it provides the best foundation for a great photo app in the future.
I hate app subscriptions! Not really a question, but so do I. That’s why Nitro has a completely free trial without a subscription signup, and a one-time purchase (lifetime) option. Nitro is more expensive than RAW Power because it does a lot more. (Apps have gotten more expensive in general to better reflect the immense effort involved, especially professional level apps.) The subscription options are there to provide flexibility: you can keep trying the app after the trial ends at a very low cost; and if you will use the app infrequently, a subscription (essentially renting it) is much cheaper than the one-time purchase.
What does this mean for RAW Power? RAW Power will continue to be maintained and offered for sale. It will NOT become a subscription app. It is less expensive than Nitro, and runs on older OS versions. I will continue to add camera support and fix bugs. You can get the update to RAW Power here.
What about other languages? Nitro is currently available in English, French, and German. I will also be localizing Nitro into Spanish, Japanese and Chinese (traditional and simplified) very soon. If you want to help evaluate the quality of the translation, email Localization Help Sign Up.
How can I ask you questions? Just email me.
The Future Is Bright
Hi everyone,
It’s been a while since I wrote a blog post. Not due to a lack of topics. Just a lack of time. So, this one will be short.
I just released version 3.4.10 of RAW Power to the App Store. It has some new camera support and bug fixes.
People have noticed that the rate of updates has slowed considerably in the past several months and wanted to know why.
Well, I’m working as hard (or harder) now than I was before. The reason the updates have been smaller is because I’m working on something really cool (and large), which cannot be released piecemeal. I’m very excited about the opportunity to show it to everyone. But now is not the time.
When it is, I will be sure to let you all know. If you aren’t on the mailing list, I suggest joining it – that’s where the big news always is published first (and I very rarely send email, so it’s not something you are going to regret doing).
Here is the link to the Mailing List
—Nik
Breaking Free: The Future of RAW Camera Support
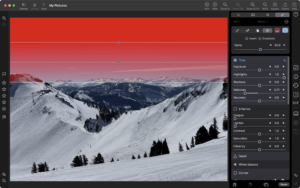
You buy a new camera and start taking pictures. You load them into Photos or RAW Power but you discover the RAW images are not supported. You think, “Well, it’s a pretty new camera; support will come soon enough.” So, you wait. And you wait. RAWs start piling up on your disk. Your Lightroom-using friends are happily editing images from the same camera. You start to reconsider your decision of editing platform.
We’re tired of this.
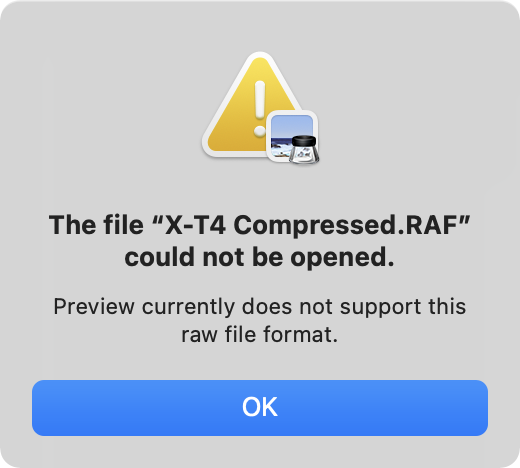
And this.
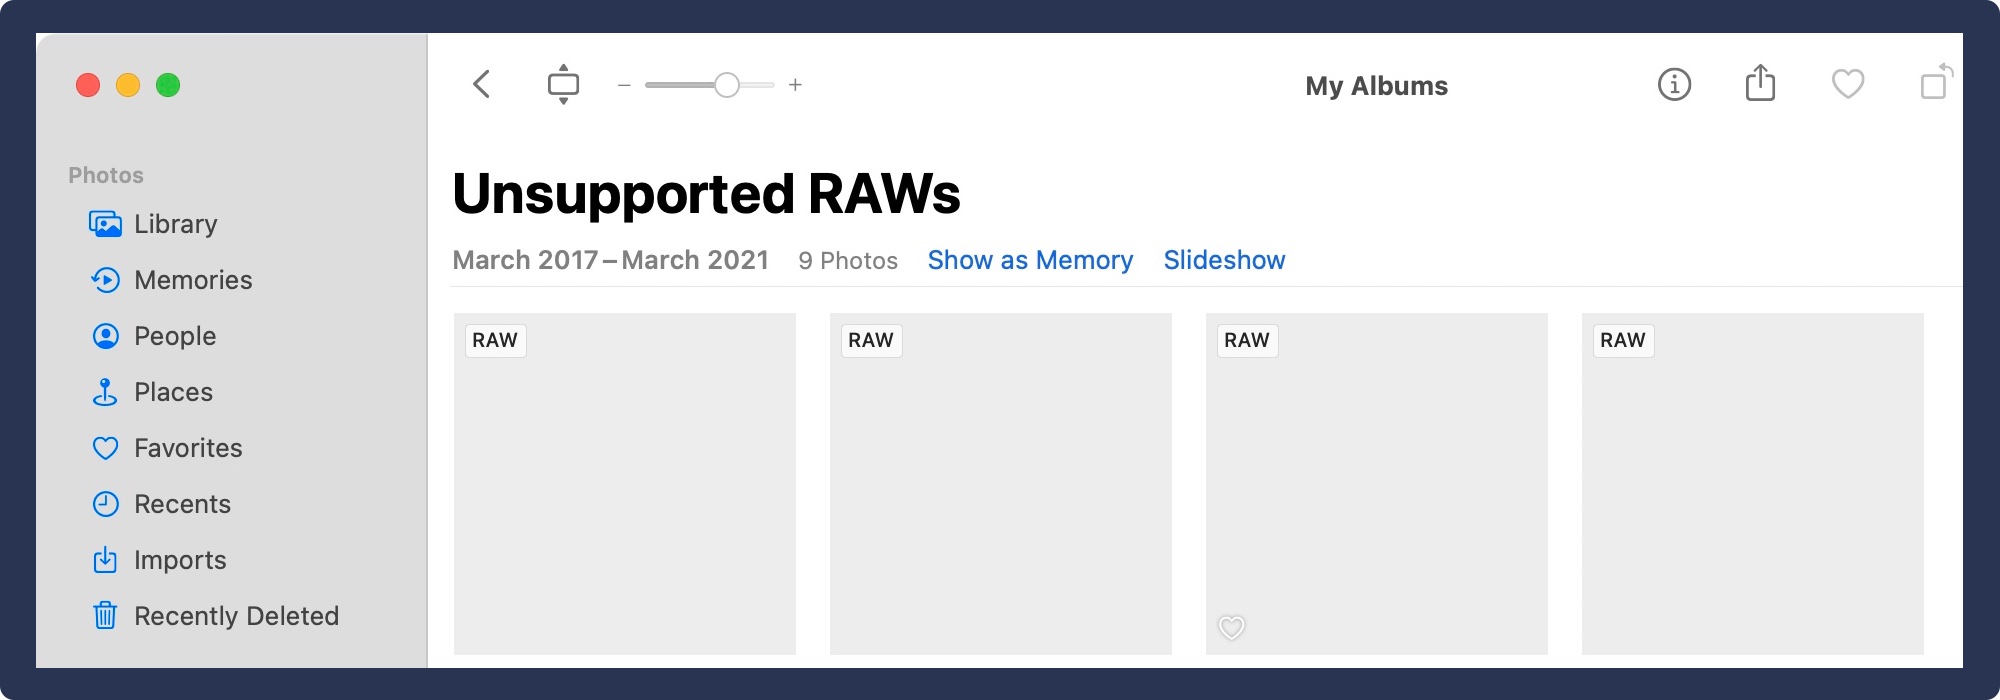
While Apple supports hundreds of cameras, the problem of unsupported RAWs happens all-to-often to photographers on the Apple platform, and the problem is getting worse with time. In addition, GoPro users have never had RAW support for any of their cameras from Apple.
Today, I’m going to describe how RAW Power is breaking free of its dependence on Apple’s camera support schedule with a new, unique feature that provides support to you faster than ever before.
What takes so long to add support for a camera?
Manufacturers have generally considered their RAW files to be proprietary or to contain “secret sauce” — metadata about their cameras or sensors that they hide in proprietary tags or even encrypt. RAW files are not documented, which is problem #1 for camera support.
Companies have to reverse-engineer the file format and then try to understand the proprietary data. At that point, they can try to decode the sensor data for display. If successful, a preliminary image becomes visible, but it’s not ready to ship. The next phase involves careful calibration and analysis of images from that camera. That phase is the difference between file format support and camera support and it’s very important.
Each software company (Adobe, Apple, etc.) has its own process for calibrating a camera, but in general, the process involves taking a series of images under controlled circumstances. The images are shot to measure such things as noise characteristics, color gamut, sensor sensitivities, and lens distortion / vignetting. There can be other attributes that must be determined camera by camera, but this is a core set.
The time to calibrate varies from company to company, and camera to camera. Some cameras have many modes, each of which has to be calibrated separately. Calibration can be very time consuming.
With respect to Apple’s camera support, it’s always been a little slow. For the past couple of years, it’s been abysmally slow. High profile cameras have been out for over a year without support. For example, the Fujifilm X-Pro3 was released in November of 2019. Apple just released support in May 2021 — eighteen months later. Other cameras have also taken over a year to support. I will say that Apple has issued two or three camera updates this year, which is certainly good news. Still, the backlog is considerable, and new cameras come out all the time.
Eighteen months for a popular camera brand is not acceptable. I don’t know why it took that long, but priorities undoubtedly factor in. I believe that camera support is just not as important to Apple as it used to be. Other cameras have been out long enough that one has to wonder if they will ever be supported by Apple.
The Pros and Cons of Using Apple’s RAW Engine
RAW Power, Photos, Pixelmator, and other apps use Apple’s RAW engine to decode and display RAW images. Apple supports hundreds of cameras with high quality decoding, excellent performance, and good color. The decoder is well integrated into Apple’s software frameworks, which makes it easy to connect to a high precision imaging pipeline like RAW Power’s. Overall, the Apple engineers have done an excellent job here. RAW Power has always had the most complete integration with Apple’s RAW engine, offering both the most features and the most control over Apple’s engine.
However, the lack of reliable camera support undermines the entire affair. Further, Apple doesn’t support Fujifilm compressed RAW images at all. This rankles in particular, as other companies’ compressed formats are fully supported. Fujifilm compression is an issue that has been going for at least five years – I have made multiple requests to no avail.
In addition, for technical reasons, Apple sometimes limits camera support to the most recent OS version, so getting a new camera can require upgrading your OS, or even having to get a new computer just to open those images.
I get emails all the time from prospective customers, who want to use RAW Power but cannot because of camera support. Or they are forced to put their cameras into special modes to avoid limitations of that support. One option is to convert unsupported RAWs to DNG. Adobe provides a free app to do this, and both Photos and RAW Power support DNG. I have suggested that to many photographers, but almost none of them have been interested in doing that.
I’m tired of turning people away. It’s time to break free of Apple’s sluggish camera support!
Breaking Free – Introducing Extended RAW
I’ve been working for a very long time on improving camera support because I wanted to provide as seamless an experience as possible. And because it’s a lot harder than I thought!
Here are the goals:
- Support missing cameras — there are many cameras that are not supported by Apple, and I suspect some of them never will be. While non-mosaic cameras like Foveon are still not supported, GoPro RAW files are now supported by RAW Power.
- Support new cameras faster than Apple will.
- Support Fujifilm Compressed images — this was actually the original impetus for the feature because after this many years, I got tired of waiting for Apple.
- Leverage Apple’s RAW decoder — there are open source libraries that can decode a large range of images, but they are slow and/or produce inferior image quality. Extended RAW images must decode quickly and with the same high quality we have come to expect. I’m not going to say how, but with my deep knowledge of Apple’s RAW decoder, I am able to use it for these images. That way, you get high quality noise reduction, highlight recovery, and more.
- Offer the same unique RAW editing features — you must get the same control over Apple’s RAW decoder (like Boost and Moiré) for these images as for other RAWs. This includes extended range and full control over highlights and color gamut. No compromises.
- Display thumbnails and metadata just as they appear for other images.
- Provide Automatic Lens Correction – Apple provides automatic lens correction for some cameras (by reading metadata stored in the proprietary files). That is not a large set of cameras, but it would great not to lose that.
To be honest, I would rather not have to implement Extended RAW at all. But, I’m proud to say that I achieved all of these goals except the last one — automatic lens correction. I did add a manual lens correction module to RAW Power. That module also has a semi-automatic mode that learns to correct your images based on manual corrections you make in the app. (One of the reasons automatic lens correction didn’t make it is because the lens correction data is not documented by camera companies.) Full automatic correction is a high priority for the future.
Which cameras have been added?
| Company | Camera | Notes |
|---|---|---|
| Fujifilm | X100V, X100F, X-H1, X-S10, X-T2, X-T3, X-T4, X-T20, X-T30, GFX 50S, X-Pro2, and X-Pro3 | Adds Compressed Support |
| Fujifilm | X-E4, GFX100, GFX100S | Not supported by Apple – Adds Compressed and Uncompressed support |
| GoPro | Hero5, Hero6, Hero7, Hero9, Fusion | Not supported by Apple (File Browser only) |
| Olympus | E-PL10, TG-5, E-M1 Mark III, E-M5 Mark III, E-M10 Mark IV | Not supported by Apple |
| Pentax | KP | Not supported by Apple |
| Panasonic | DC-S5, DC-G100, DC-G110 | Not supported by Apple |
| Sony | Alpha-1 | Not supported by Apple |
The full list is at: https://www.gentlemencoders.com/extended-raw
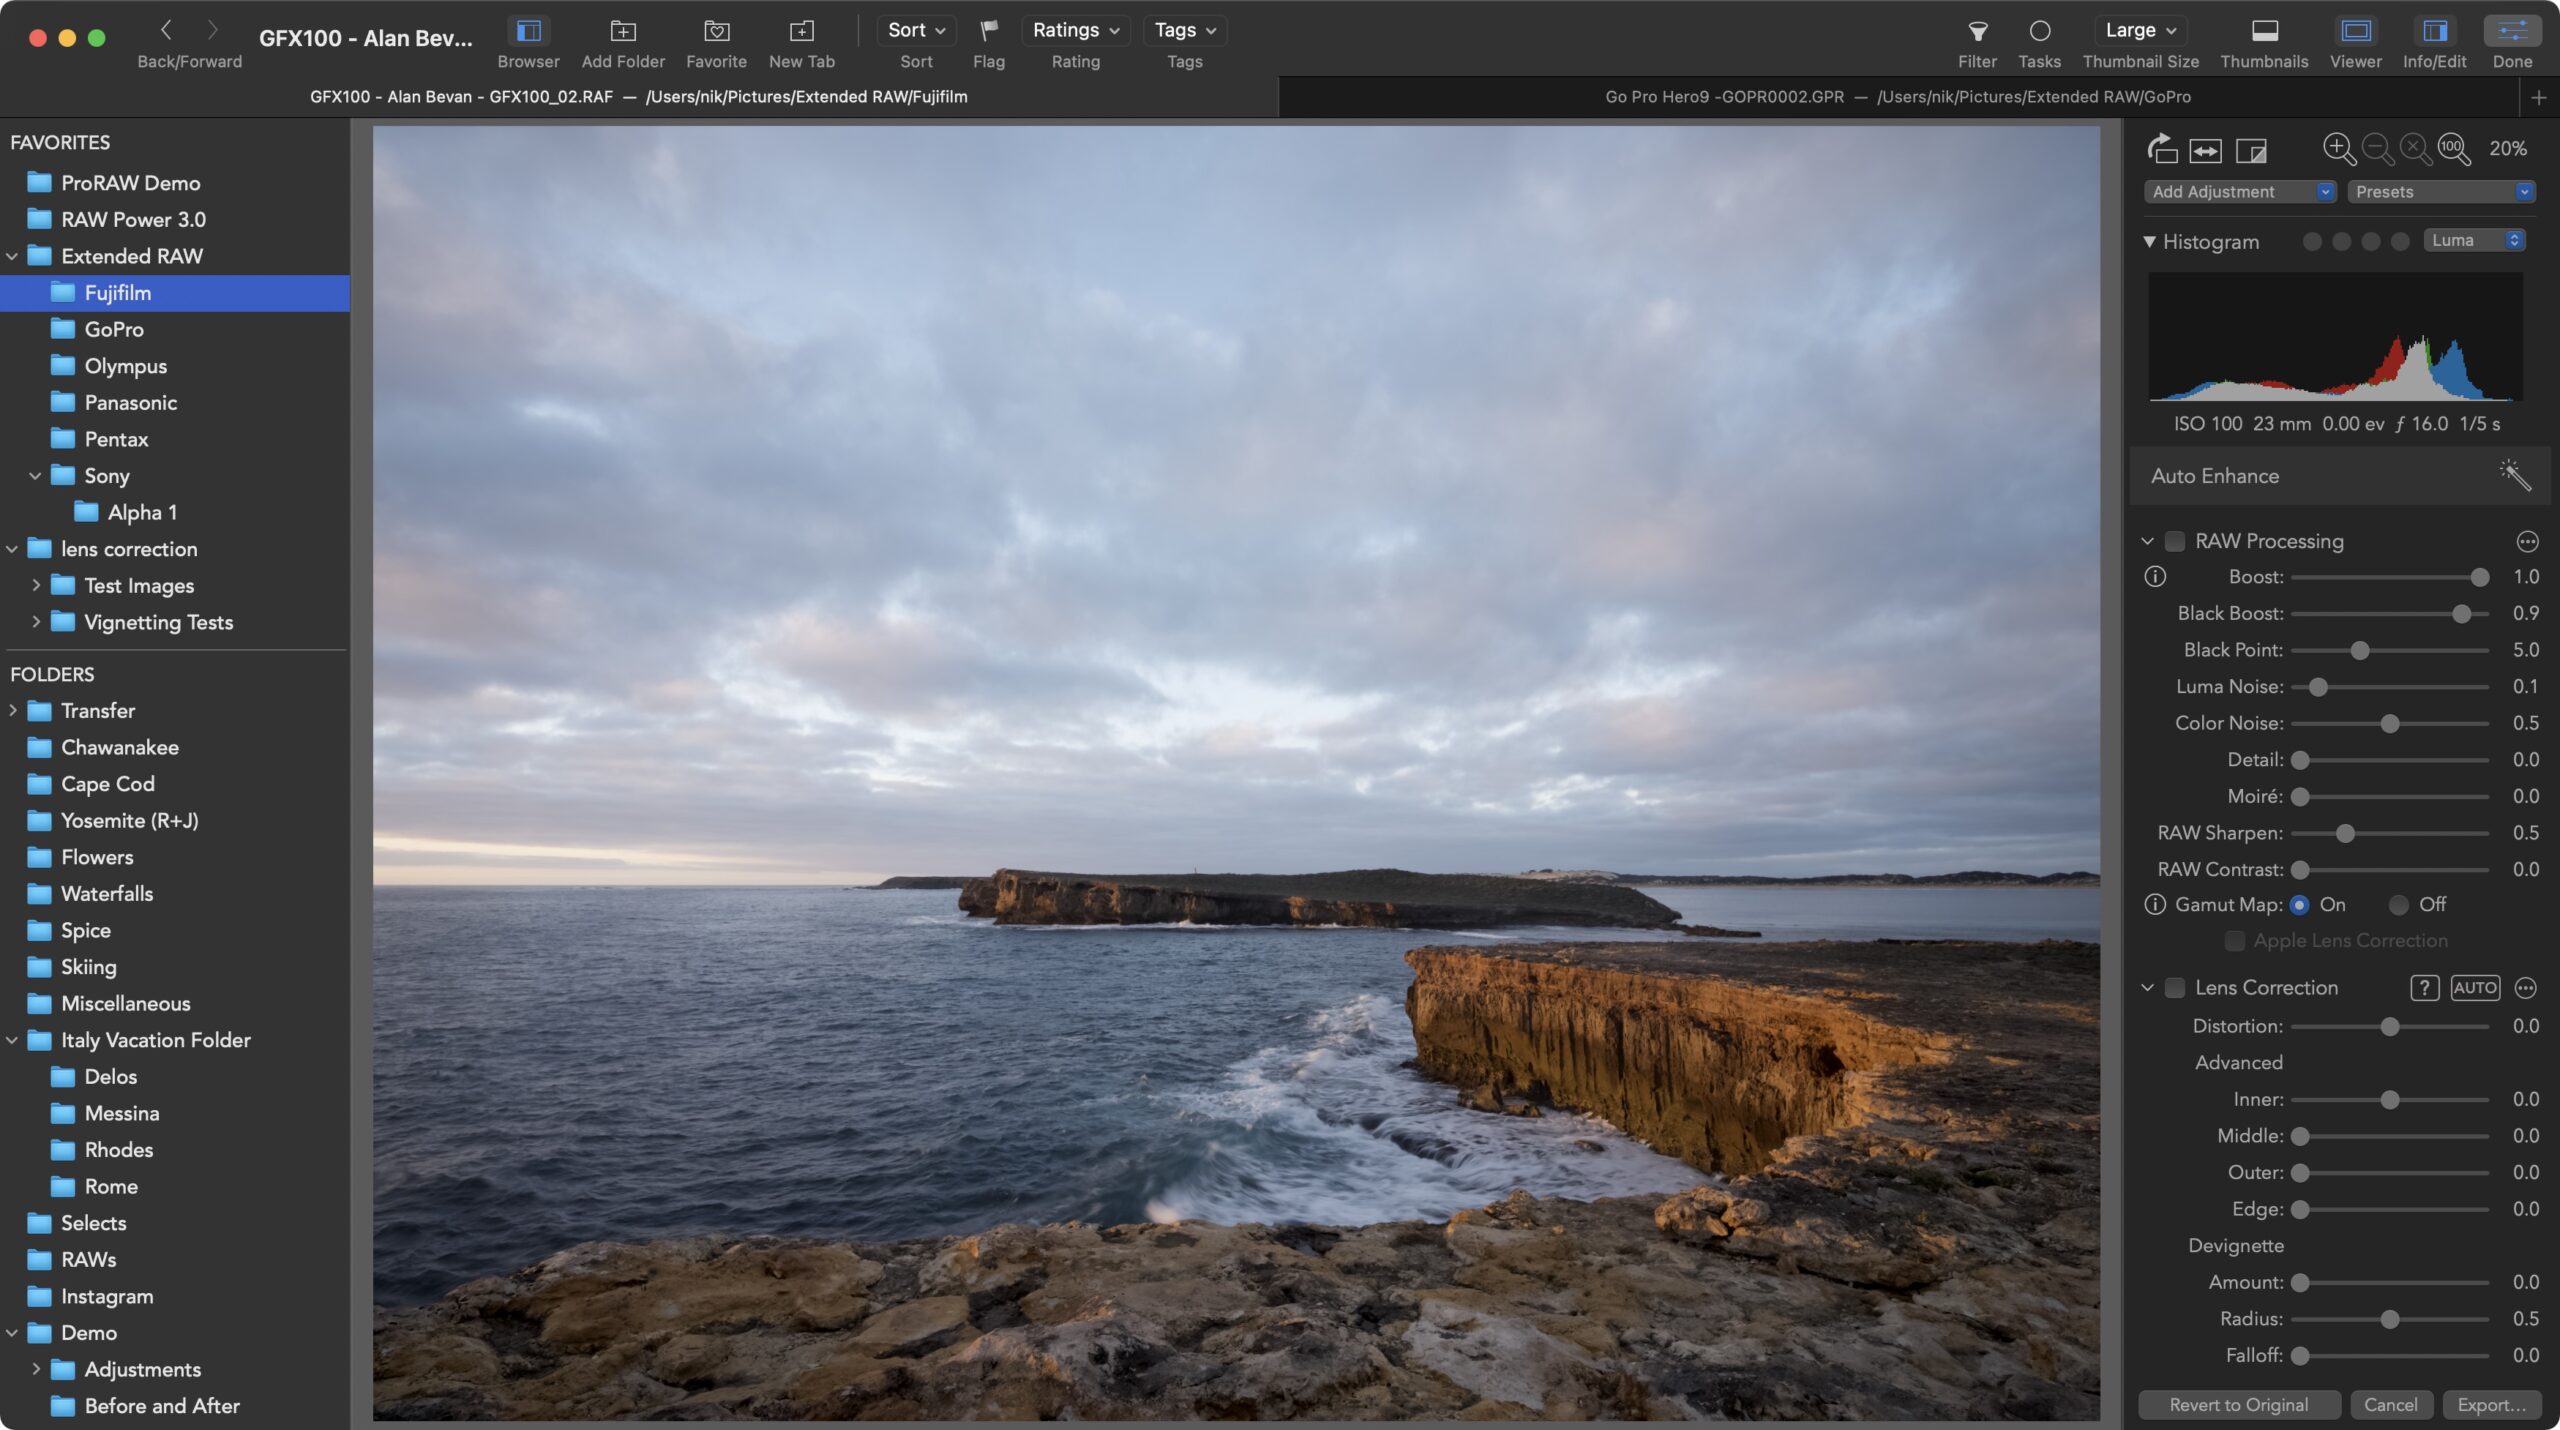
Here is Extended RAW in action showing a Fujifilm GFX100 image with full RAW editing sliders. Photo copyright: Alan Bevan. Used with permission.
Future Proofing — What if Apple adds support?
The Extended RAW feature is built with future OS updates in mind. If Apple adds support for a camera on the RAW Power extended list, Apple’s support automatically takes precedence. And if Apple provides automatic lens correction for that camera, then the RAW Power manual lens correction turns off.
How do I get it?
This feature is part of RAW Power 3.3, which is a free update, available for download on the Mac App Store (https://rawpower.app/get-mac) and iOS App Store (https://rawpower.app/get-ios).
Extended RAW support requires macOS 11 and iOS 14. It works in the RAW Power file browser, and even when RAW Power with the Apple Photo library. So, yes, you can actually view, edit, and work with images in the Photo library that Apple’s own Photos app doesn’t support. You can download an unlimited trial version for Mac here: https://gentlemencoders.com/raw-power-for-mac-trial/, and the iOS version now has a built-in unlimited trial mode, so you can check it out for yourself.
If your camera is missing, drop me a line at support@gentlemencoders.com and I can see what I can do.
FREEDOM!
Quick Tips For Improving Your Photographs
When it comes to digital photography, the iPhone is a marvelous piece of engineering. Each time Apple introduces a new iPhone model, it always comes with more improved photography performance and much better features. Capturing everyday subjects is easy to do and you will get great results with your iPhone. Still, as with anything, there is always room for improvement and, with some easy tips and the RAW Power® App, you can take your photography to the next level.

How To Take Your Photography To The Next Level
Get it right the first time – many of us inadvertently take photos with a smudgy lens, causing photos and videos to look blurry. With a few wipes using a proper lens wipe cloth, you can get completely different results. An important step to take better shots with your iPhone is to get closer. You will lose clarity and details when you use digital zoom in too much. Instead, Zoom by moving your feet. Taking your shots closer will also improve composition. For balanced composition, you should use grid on the viewfinder screen. When using the 9-rectangle grid, make sure that the primary subject is right in the center. Go to Settings> Photos & Camera and enable the Grid feature. You can fix composition issues in RAW Power, but it’s best to get it right the first time.
Improved Lighting- if possible, take pictures at the golden hours, during sunrise and sunset, when natural light is softest. Because pictures then have more yellow, orange, and red, they appear warmer. These moments are also perfect to capture breath-taking landscapes and silhouettes.
Although newer iPhone’s have excellent low-light performance, it’s recommended to use artificial lighting such as ring lamps, daytime permanent photographic lights, or hand lamps when necessary, such as when you are photographing outside and running out of daylight. Avoid using flash because it’s harsh and colors will tend to look washed out. Good artificial light shouldn’t be too bright, and it should come from all sides. Make sure to enable the HDR mode, because it increases contrast and color range when taking low-light photos. HDR measures the brightest and darkest parts of the photo and balance them.
Use Photo Editing Apps- a good photo editing app such as the RAW Power Photo Editing App can tune images by enhancing details, exposure, and color digitally. To improve composition, you can change perspective, rotate, and crop your photos.
RAW Power’s Professional Photo Editing Features
Giving you a wide range of professional photo editing features, the RAW Power® Photo Editing App can help you produce professional looking photographs. With an all new HSL Color Adjustment feature with 9 built in hues as well as a custom hue option, you can truly customize the final appearance of your images with more vibrant colors than ever. Many workflow features make the editing process simpler and much more intuitive. Users can edit either the RAW or JPEG of a R+J pair in the Photos library, filter them by date, favorite status, and location status, as well as use the improved adjustment menu to collapse all adjustments, expand all adjustments; collapse all others or keep only one adjustment open at a time.
It’s important to note that, while taking the actual photograph is important, much of the work making it perfect comes afterward, during the editing stage. RAW Power’s editing features are designed to be easy to use, feature rich, and to provide professional level results. If you have an iPhone 12 Pro, you can shoot in Apple’s new ProRAW format. One of the most powerful features of RAW Power is its ability to edit ProRAW images using local tone mapping for contrast, exposure, and highlight recovery. There is also a video you can watch about ProRAW Editing at: https://www.youtube.com/watch?v=LguSpnDoShM
Contact Gentlemen Coders
To learn more ways to take great photographs, contact Gentlemen Coders and download the RAW Power® app today.
If you enjoyed this article, please feel free to share it on your favorite social media sites.
6 Expert Tips For Macro Photographers

Macro photography is all about taking pictures of tiny objects from a remarkably close distance. Today, it’s one of the most popular photography techniques, because it’s interesting to see intricate details of everything from insects and plant life to birds, fish, and more. If you’re an aspiring macro photographer and want to get better results, here are some tips that experts suggest.
6 Expert Tips For New Macro Photographers
Stabilize – because you are taking pictures of a very small object, any slight movement could cause blurriness or loss of details. Blurriness could be exaggerated if the lens is very close to the subject and the magnification level is high. So, it is important to keep the camera stable and motionless.
Adjust The Subject – if you already set up the camera with the proper settings and stable tripod positioning, you shouldn’t move it. Instead, move the subject to place it at proper distance and position from the camera lens. In macro photography, this technique is a big timesaver.
Improve Composition – if you are focusing on a tiny object, make sure it’s positioned in the middle of the frame. If you are shooting at a small pattern, try to fill whole frame with it. Experiment with different composition styles, until you get best results.
Clean Up – when taking macro photographs, you will realise that fingerprints, hair, dirt, and dust could become annoyingly visible. Make sure that the subject and camera lens are perfectly clean.
Use Flash Properly – beginners are reluctant to use flash, because it could make the subject too bright and the details less visible. Flash still works in macro photography if it’s positioned farther away. Use off-camera flashes that may give you more natural results.
Use The RAW Power® App- today’s smartphones have incredibly advanced cameras. Giving you a wide range of professional photo editing features, the RAW Power® Photo Editing App can help you produce professional looking macro photographs.
Contact Gentlemen Coders
To learn more ways to take great macro photographs, contact Gentlemen Coders and download the RAW Power® app today.
If you enjoyed this article, please feel free to share it on your favorite social media sites.
RSS feed has moved
The new URL is https://support.gentlemencoders.com/feed